Epoxy concrete floors have gained immense popularity in both residential and commercial spaces due to their impressive durability, striking aesthetic appeal, and ease of maintenance. These floors are created by applying a two-part epoxy coating to a prepared concrete surface, resulting in a hard-wearing, attractive finish that can withstand heavy foot traffic, chemical spills, and general wear and tear.
In this guide, we will walk you through the step-by-step process of installing an epoxy concrete floor. You can transform your concrete floor into a durable and attractive surface that enhances the overall look and functionality of your space.
Epoxy Concrete Floor Installation
One of the key benefits of epoxy flooring is its long-lasting durability. Once applied, it forms a resilient surface that resists cracking, chipping, and staining. Additionally, the glossy or metallic finish of epoxy floors adds a sleek, modern look to any space, making them a favorite among homeowners and businesses alike.
Here is the step-by-step guide for epoxy concrete floor installation:
Step 1: Preparing the Concrete Surface
The first step in installing an epoxy concrete floor involves thoroughly preparing the concrete surface. Begin by cleaning the surface to remove any loose debris, dirt, grease, or stains.
Next, inspect the surface for any cracks or imperfections and mark these areas for repair. Apply a concrete patching compound or epoxy filler with a putty knife, and let the filler cure. Once cured, sand the repaired areas smooth and remove any dust or debris.
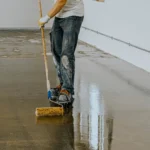
Finally, etch the concrete to create a rough texture for better epoxy adhesion. Wear protective gear, apply the etching solution with a plastic watering can or garden sprayer, scrub the solution into the concrete, and rinse thoroughly with clean water. Allow the concrete to dry completely before proceeding.
Step 2: Applying the Primer
Choosing the right primer is crucial for a successful epoxy floor installation. Select a primer compatible with epoxy floors, considering factors such as the type of concrete and environmental conditions. Gather the necessary tools and materials, including the following:
- primer,
- mixing tools, and
- application tools (roller or brush).
Follow the manufacturer’s instructions to mix the primer and apply it evenly across the surface using a roller or brush. Ensure the primer is spread uniformly and allow it to dry according to the manufacturer’s recommended time before moving on to the next step.
Step 3: Mixing and Applying the Epoxy
Selecting the appropriate epoxy resin and hardener is essential for a durable and high-quality finish. Choose products that are compatible and of high quality. Gather the necessary tools and materials, including the epoxy resin, hardener, mixing bucket, and mixing tool. Follow the manufacturer’s instructions to mix the epoxy resin and hardener in the correct ratio, ensuring a thorough and even mix.
Once mixed, use a roller or squeegee to apply the epoxy mixture to the floor, working quickly and efficiently to ensure an even coat. Allow the first coat to dry according to the manufacturer’s instructions before proceeding to any decorative elements or the topcoat.
Step 4: Adding Decorative Elements (Optional)
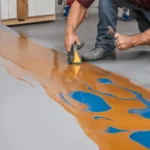
Adding decorative elements such as solid color chips or flakes can enhance the visual appeal of your epoxy floor. Choose your desired decorative elements and apply them evenly over the wet epoxy by sprinkling them by hand or using a blower.
If you wish to create patterns or designs, plan your design in advance and gather the necessary tools. Use tape or stencils to create patterns before applying the epoxy, and carefully remove the tape or stencils after the epoxy is applied to reveal the design.
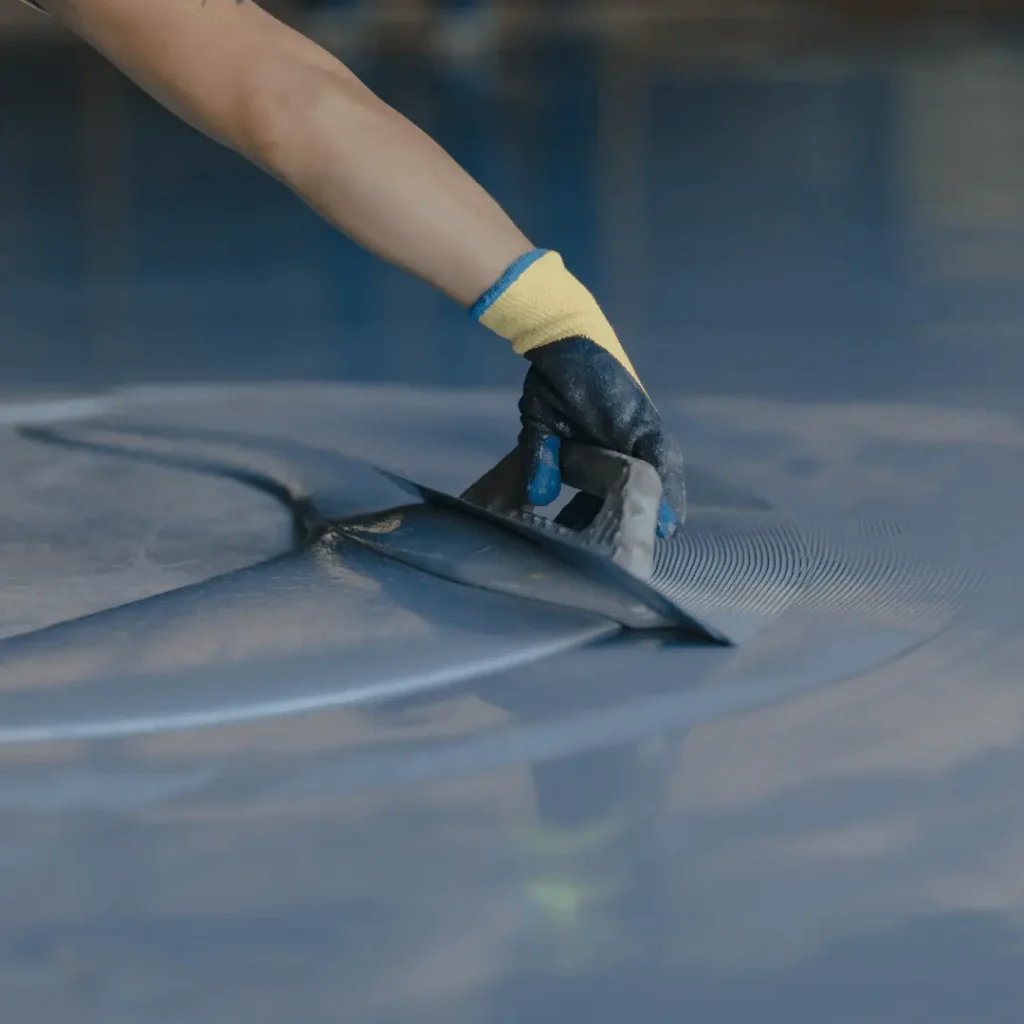
Step 5: Applying the Topcoat
The final step in the epoxy floor installation process is applying the topcoat. Choose a topcoat that complements your epoxy flooring and provides the desired finish and protection. Gather the necessary tools and materials, including the topcoat, mixing tools, and application tools. Ensure a uniform application and allow the topcoat to dry and cure according to the manufacturer’s recommended time.
By following these steps meticulously, you can achieve a professional-quality epoxy concrete floor that is both durable and aesthetically pleasing.
Why is Professional Installation Better Than DIY?
When it comes to installing epoxy concrete floors, many homeowners and business owners may consider taking the DIY route to save on costs. However, professional installation offers several significant advantages that often make it a better choice.
Expertise and Experience
Professional installers have extensive experience and specialized knowledge in handling epoxy floor installations. They understand the nuances of surface preparation, mixing ratios, and application techniques that ensure a flawless and durable finish.
This expertise helps in avoiding common pitfalls that DIYers might encounter, such as improper mixing, uneven application, and inadequate curing times, which can compromise the floor’s durability and appearance.
Quality of Materials and Tools
Professionals have access to high-quality materials and industrial-grade tools that are not typically available to the average DIY enthusiast. These superior materials and tools contribute to a better-quality finish and a longer-lasting floor.
Additionally, professionals are skilled in selecting the right type of epoxy and additives for specific environments, ensuring that the flooring can withstand the intended use and conditions.
Time Efficiency
Installing an epoxy floor is a time-consuming process that requires meticulous attention to detail at each step, from surface preparation to final curing. Professionals can complete the job much faster than a DIYer, thanks to their experience and efficiency. This means less downtime for homeowners and businesses, allowing them to resume normal activities sooner.
Long-term Cost Savings
While DIY installation might seem cost-effective initially, any mistakes made during the process can lead to costly repairs and replacements down the line. A professionally installed epoxy floor is more likely to be done right the first time, reducing the likelihood of future issues.
This long-term reliability translates into cost savings over time, as the need for maintenance and repairs is minimized.
Warranty and Assurance
Many professional installers offer warranties on their work, providing peace of mind that any issues will be addressed without additional costs. This assurance is typically not available with DIY installations. The warranty not only covers the quality of workmanship but also ensures that the materials used are up to standard, providing added security for the investment.
Conclusion
While DIY epoxy floor installation might be tempting for its potential cost savings, the benefits of professional installation make it a more advantageous option for most homeowners and businesses. Visit this URL: https://apexflooringllc.com/apex-epoxy-flooring-of-melbourne/ to learn more about the services that we offer in Melbourne, FL. From superior quality and efficiency to long-term cost savings and safety, you can never go wrong with professional epoxy installation with the help of Apex Epoxy Flooring. Contact us today to book your free consultation!